How to Use an Image From the Internet in Art Academy 3ds
Learning
How to Brand a Realistic CG Environment Using 3ds Max and V-Ray
The beginning step is to notice an HDRI to realistically illuminate your overall scene, and especially if your environment is outside. The HDRI choice tin completely change the mood of your scene, and then choose wisely!
Robin is a 23yr-old studying in his terminal twelvemonth at New3dge in Paris. Alongside his studies, Robin is also doing an internship at Nki Studio in Paris. Robin aspires to be surroundings / lighting artist. In this post he shares with us his process for making realistic CG environments using 3ds Max and 5-Ray.
Referencing several personal projects that I accept done, I will endeavour to explain my process to create a full CG environment in a few steps. That is to say, the set upwards of my scene, the lighting, the fog, my assembly/modeling/shading, the rendering, then the post production I do in Adobe After Furnishings. I will talk a bit about which plugins I utilise, the procedure, and why I use them.
In 3D, in that location are hundreds of ways to achieve a result, what I am describing here is only ane way to do it. I have learned a lot and take refined my processes alongside my studies. But of course, everyone is free to create their own procedure. And of grade, I do non pretend to take the background to teach a way to work, only maybe it could help new artists who are just getting started!
Collecting Reference
The very first thing I exercise when starting a projection is wait for references - it could be photos found on the cyberspace, images from movies or sometimes concept art. This is a very important step, but the most important thing will be to continue to study this reference as you lot work on your project and then equally not to go lost. I often use PureRef to make my reference board.
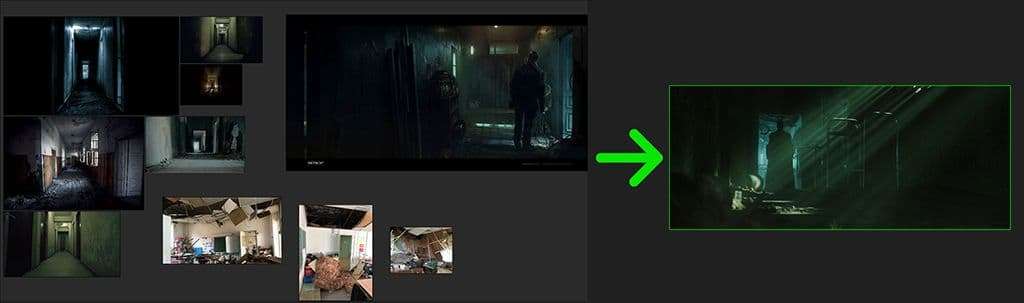
As you tin can come across above, I only chose i concept art prototype which is Carlos Ortiz Corridor from Antoine Boutin. I used this concept equally a reference for the colors. I also chose several real images, and then that I don't lose the details that will requite realism.
[Collecting reference] is a very of import step, but the nigh important thing will exist to continue to study this reference as yous work on your project then every bit non to get lost.
Blocking
The showtime thing you will practise in 3D volition be to cull the image format - 1920x1080 or 1920x917 for example. And then you have to identify your camera in the scene to do very elementary blocking. The goal is to lock the placement of the photographic camera. Past doing this, you will only have to piece of work in the photographic camera'due south view, information technology will avert wasting fourth dimension by working on an nugget that will non be in the camera'southward view. It is also important to take care of the focal length y'all desire to work with.
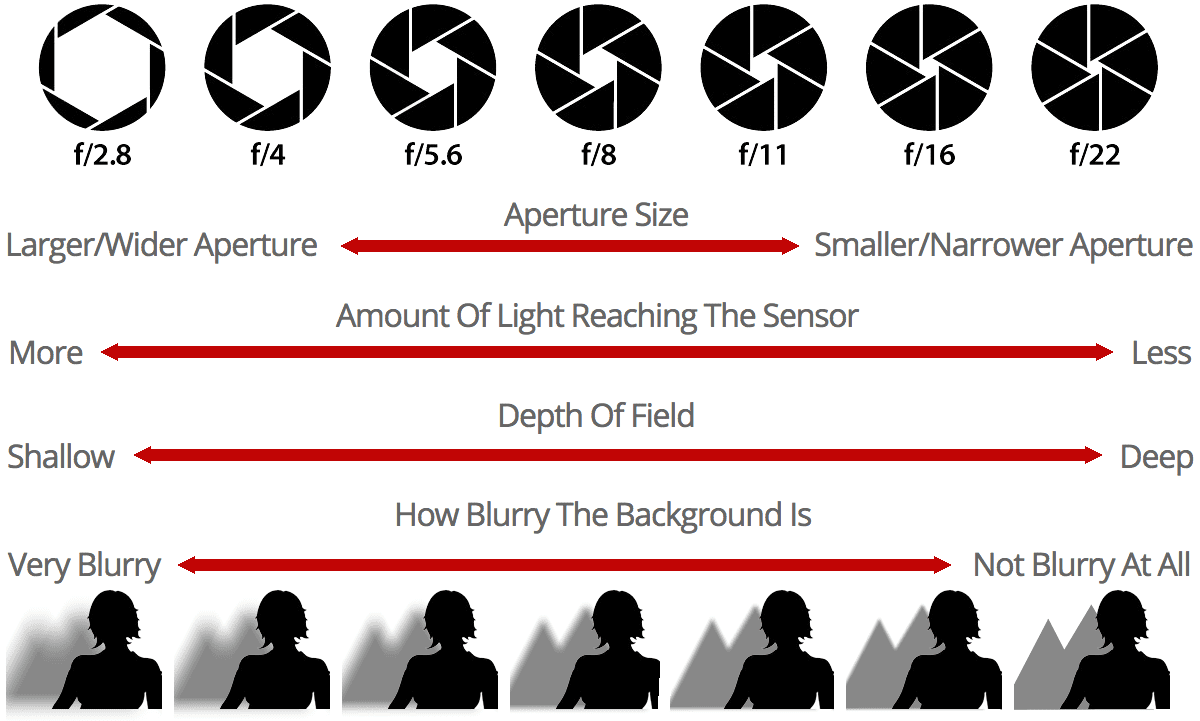
It is also of import to define the depth of field yous want and likewise what aperture you want. I always set my depth of field in 3D considering information technology saves fourth dimension - y'all volition notice that some assets are totally blurred because they are out of focus, then these assets don't need a lot of work. There is an paradigm that shows how aperture affects your image.
For me the blocking role is 1 of the virtually complicated, considering it could make you lot lose motivation. Indeed, the image is still very basic, it's non really nice looking, and so yous tin waste material a lot of time trying to detect something cool which tin exist quite frustrating and consuming. Sometimes y'all take to find the courage to delete everything and start all over over again to finally find something yous like!

Lighting and Atmosphere
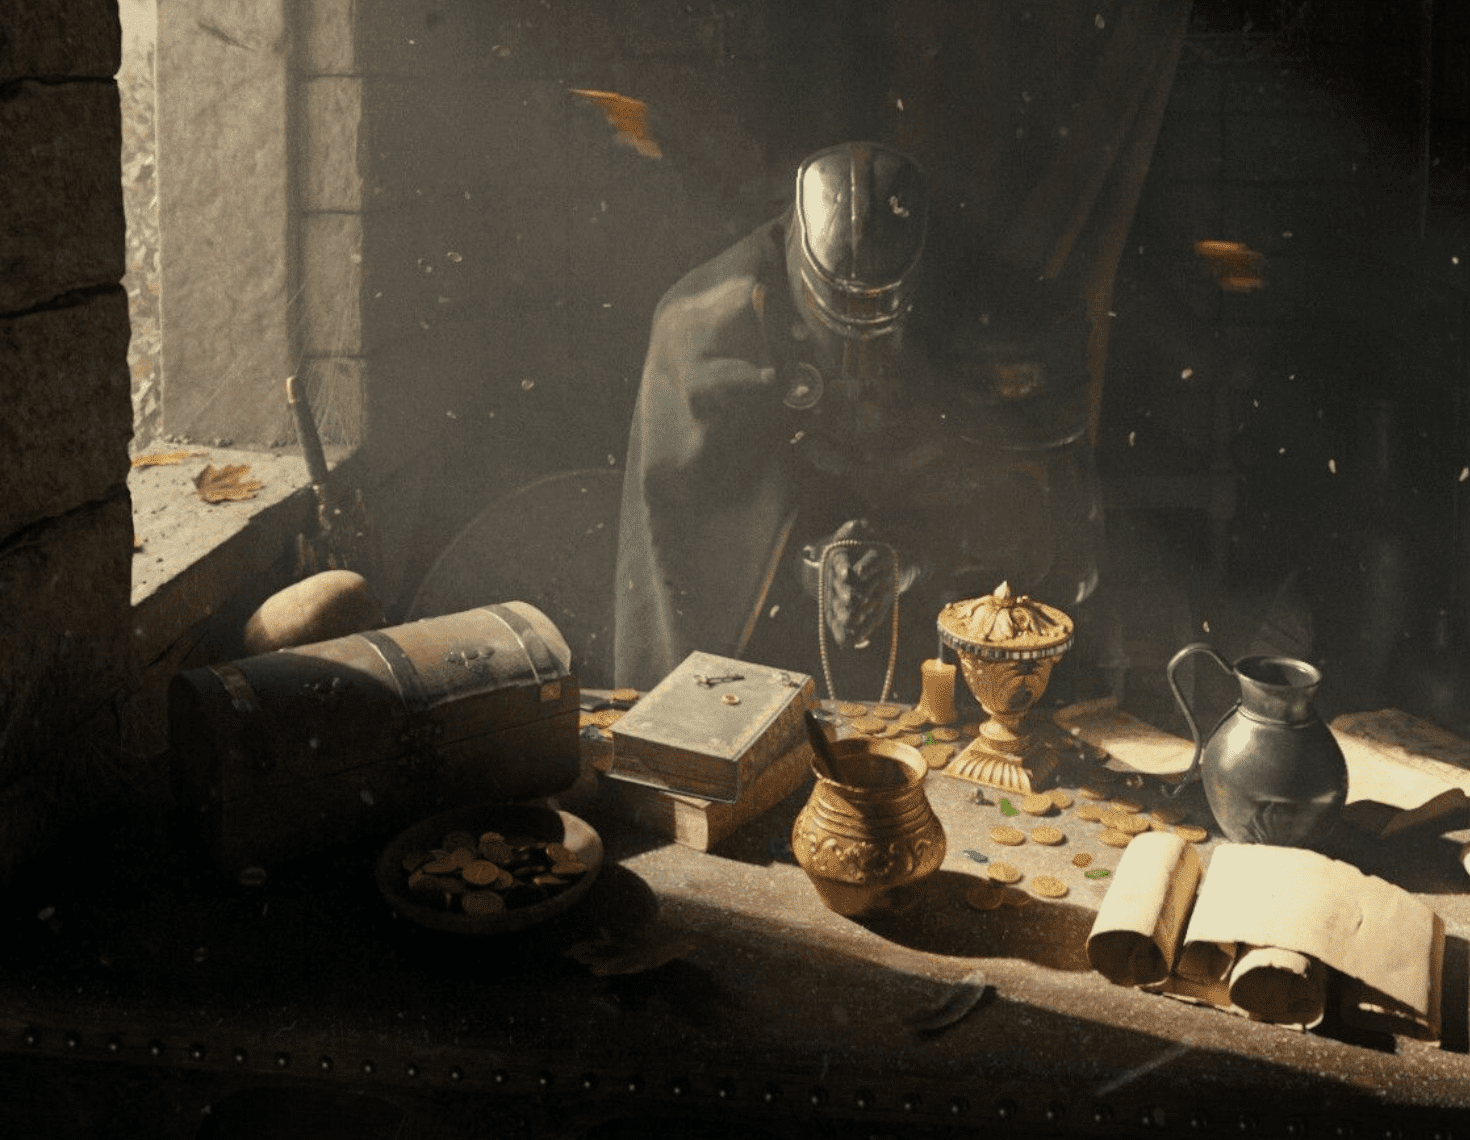
This is one of my favourite parts considering now you can requite life to your scene. The first pace is to notice an HDRI to realistically illuminate your overall scene, and peculiarly if your environment is exterior. The HDRI selection could completely change the mood of your scene. In add-on it is important to manage the fog of your scene. In Five-Ray it is called FiveRayEnvironmentFog.
[When blocking out your scene], sometimes you take to find the backbone to delete everything and start all over over again to finally discover something you like!
I merely tweak ii values which are: the Fog distance and the Fog summit. You tin find a lot of interesting data on the ChaosGroup Documentation for V-Ray and 3ds Max.
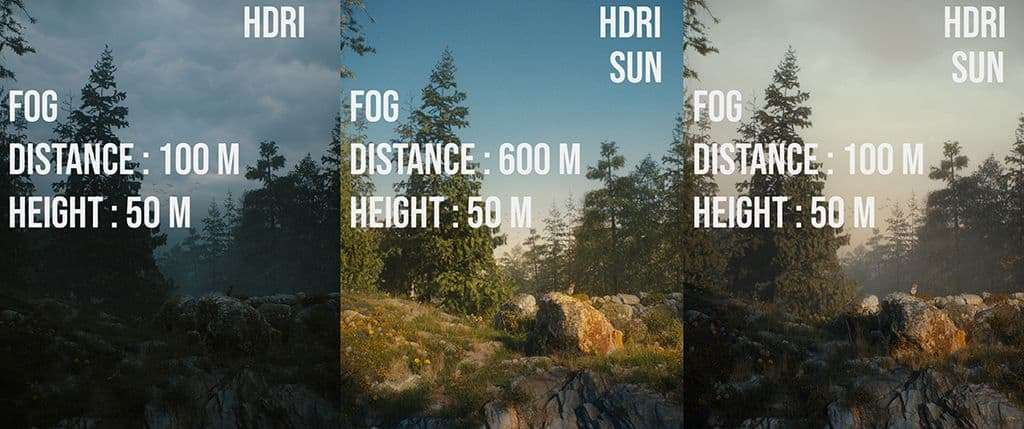
Here I used three different HDRI for the same surroundings. For two of the iii environments I added a VRaySun.
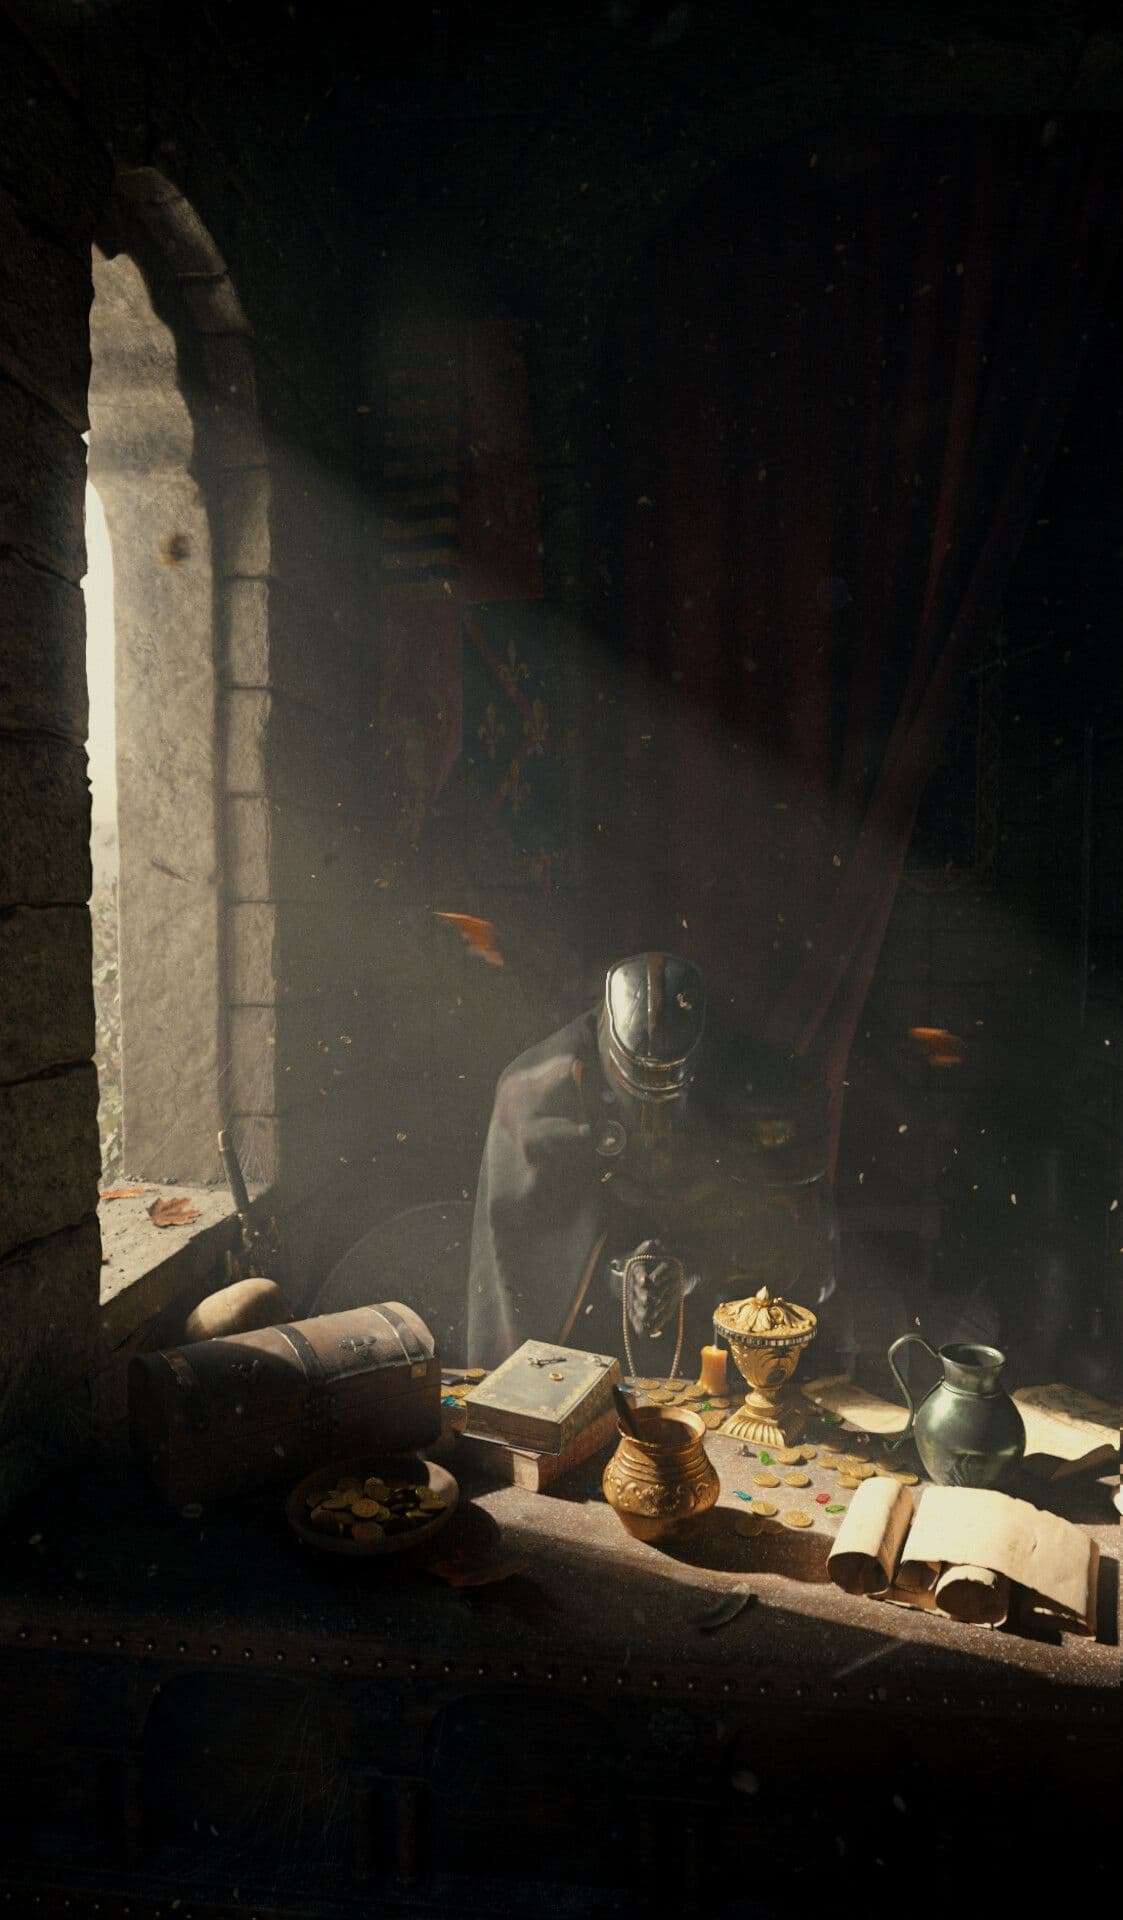
I have done the same process for an interior environment. For the scene in the example below, I wanted to become some "God rays" and so I had to reduce the fog distance to get something more dense.
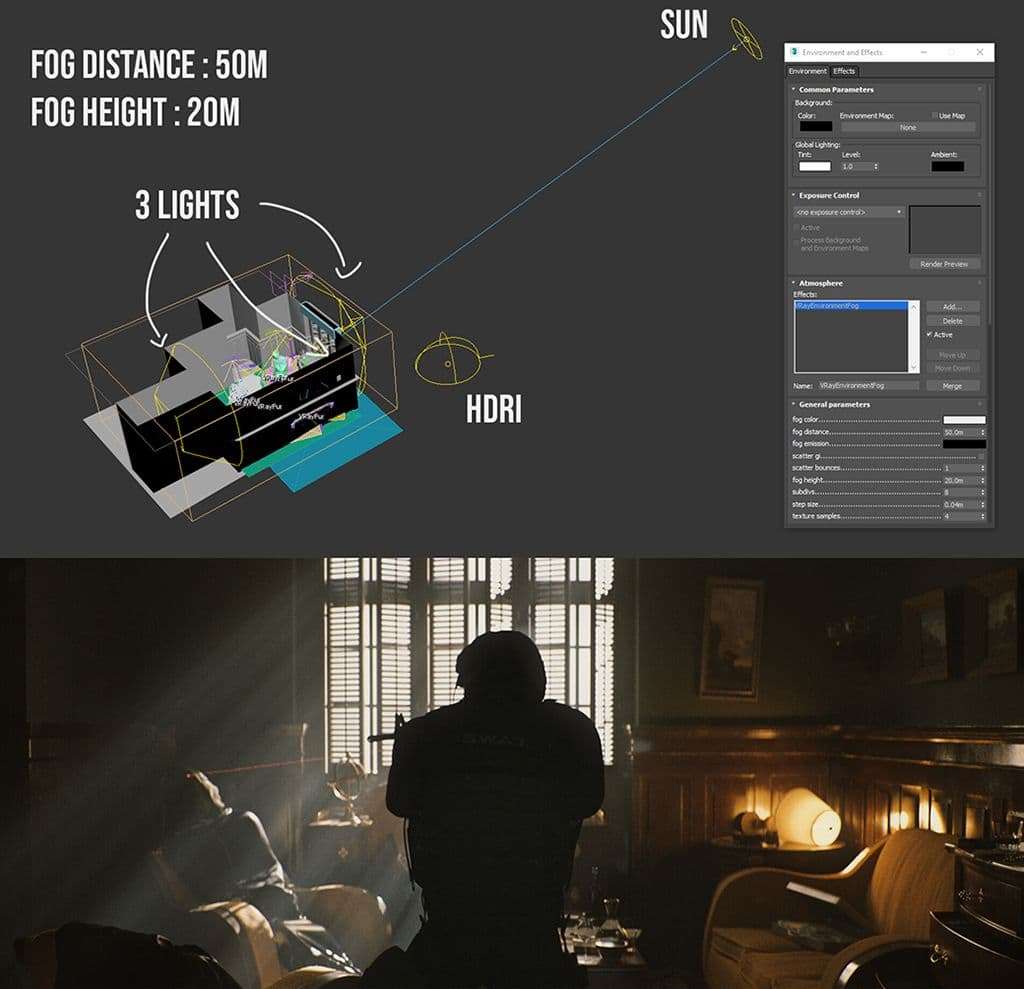
My advice for the lighting is go slowly. Well-nigh of the time I started with the VRaySun and then I added more lights simply not too many! You will lose yourself and yous will increase your render time likewise. The website where I download all my HDRI is: NoEmotions
Modelling, Shading and Assembly
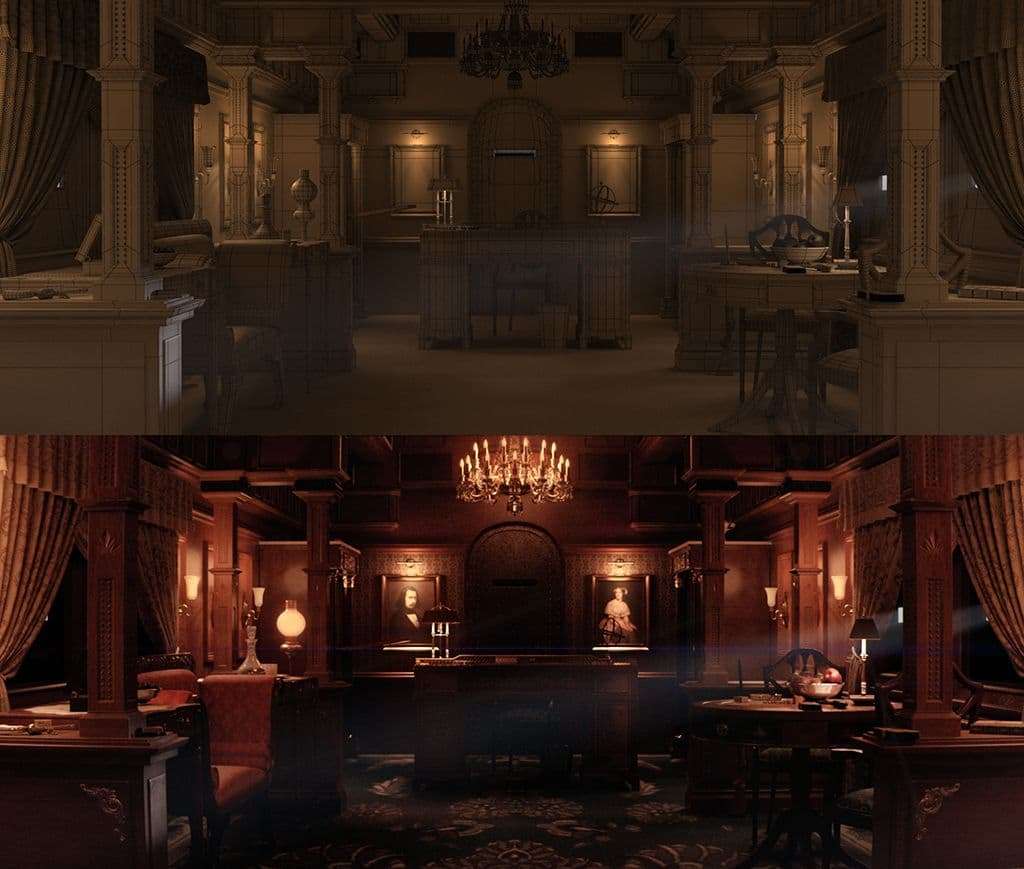
Modeling can be very time consuming, especially at the first when you are new to 3D. This scene, largely inspired by a mission of Red Dead Redemption 2, is the very first personal project environs that I created in Dec 2018. I modeled pretty much everything except some props similar the chandelier and some pistols.
It was very time consuming but I gained speed by learning a lot. Today, I don't necessarily model everything in my scene. I accept invested in a Megascans account and sometimes I wait for costless models on the internet similar on Sketchfab. This helps to gain time and is therefore much more than productive. Nevertheless, it's important to know how to model what you take from the internet too.
The shading part is also i of my favourite parts. I worked in 3ds Max as much as possible then equally not to waste fourth dimension - the model does not necessarily have to be unwrapped, a simple UV box works perfectly and saves a lot of fourth dimension.
Personally, in add-on to the classes I've had, I've watched a lot of tutorials on V-Ray shading. Adan Martin tutorials are very practiced. It's of import not to simply copy what yous've seen in a tutorial, you really need to understand what you are doing. Even if information technology means redoing the shaders several times then it all makes sense. Once you take understood information technology will be very unproblematic to chop-chop make realistic shaders and therefore salvage you a lot of time.
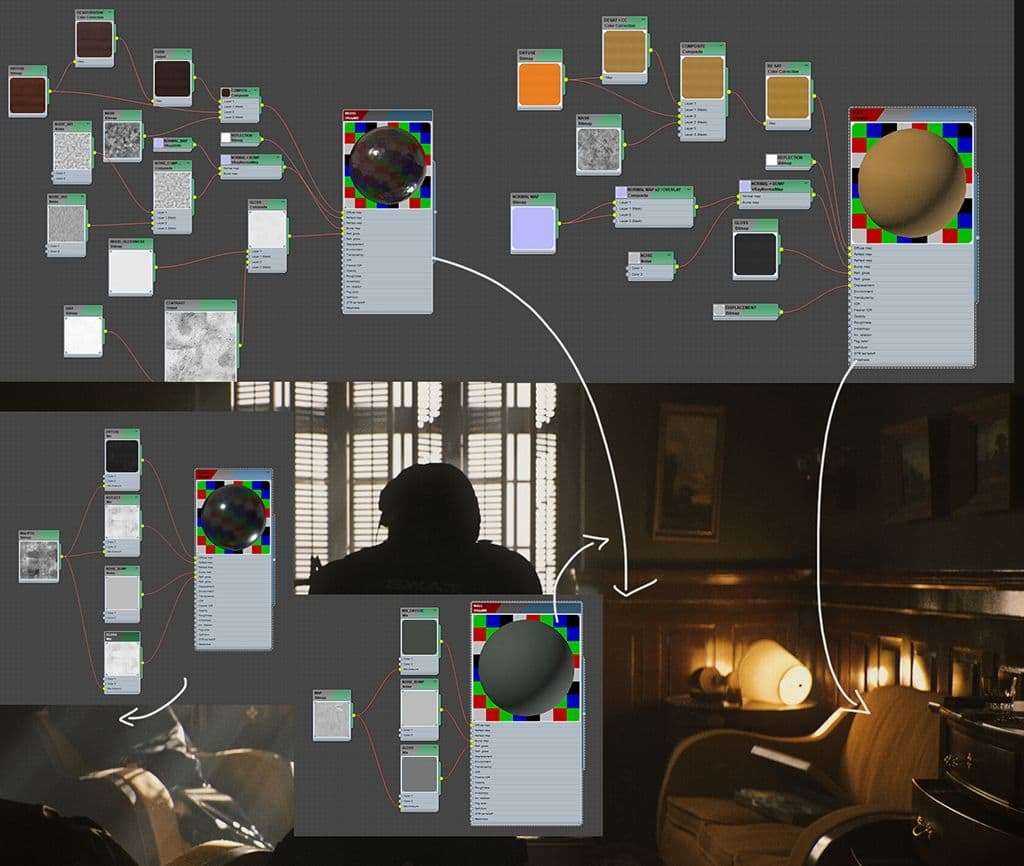
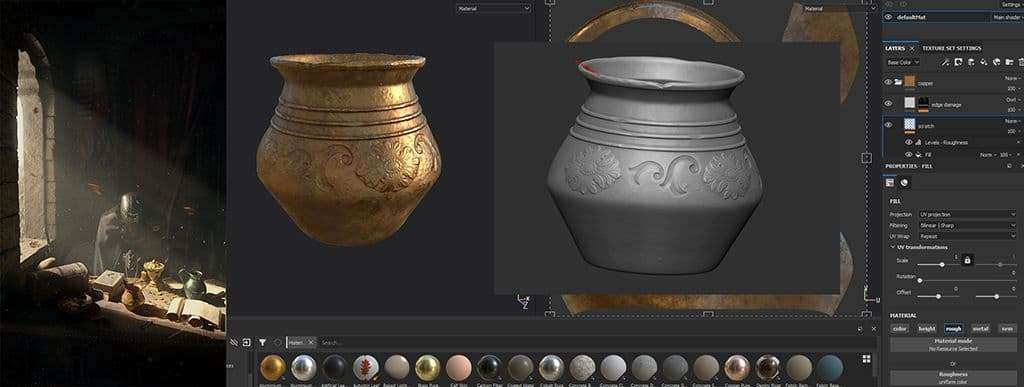
When I needed my shader to exist a bit more specific, or when I had to add together details in a mesh on Zbrush, I baked and textured my mesh in Substance Painter and and then I imported it in 3ds Max.
Another important tip I could give is to always piece of work in photographic camera view. Personally, I don't observe it necessary to work on shading in a different bending of view, other than our photographic camera. It is therefore not necessary to waste time detailing an object in the background; often a unproblematic shader is enough. On the other manus, the closer the object is to the photographic camera, the more than work it will require.
Information technology'south of import non to just copy what you've seen in a tutorial, you actually need to understand what you are doing. Even if it means redoing [things] several times so it all makes sense.
Equally I go along to look at my references and do new research I keep to expand my surround with details that will make information technology realistic. Just look at the earth that surrounds us, there is a multitude of details, these details will make your scene realistic.
Rendering
During the process I do many rendering tests so I don't launch my concluding render and terminate up with something wrong. Don't hesitate to lower the quality when y'all are doing a render test, you will go much faster. Then, when your scene will be more avant-garde you lot volition be able to increment the quality. For instance for my test I sometimes halve the size of my renderings. Instead of beingness in 1920x1080 I make render tests in 960x540 or I'll put lower values for the samples.
In V-Ray, for the last render I use this kind of set upwards:
- Min subdivs : i
- Max subdivs : min 12 or max xvi
- Racket threshold : 0.01
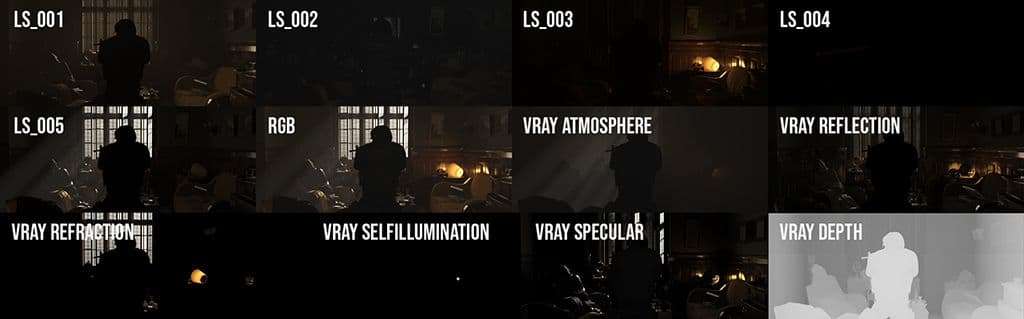
It's also important to render sure passes that will later exist used to compose and improve your image.
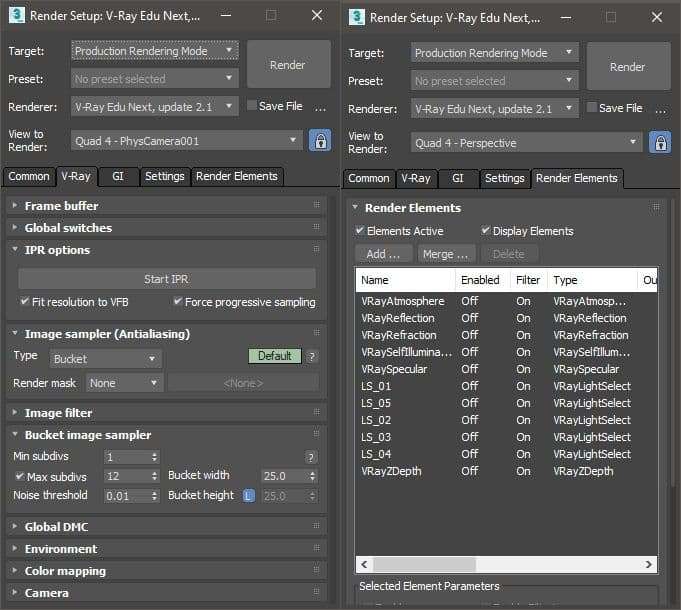
In the VRayAtmosphere you will have merely your atmosphere, it allows you to re- light your scene. The VRayReflection allows you to heave reflections. The VRayRefraction allows you to tweak the refraction. The VRaySpecular allows you to boost the specular. The VRaySelfillumination allows you to isolate all objects in self illumination, to then be able to put some glow on them. The VRayZdepth allows you to integrate stockshot in the depth of the image by using it as a mask.
COMPOSITING
I exercise my compositing and grading in Adobe Afterwards Effects with plugins like Magic Bullet Looks past Carmine Giant. It is the method I accept been taught at school, then that's how I'one thousand working on my graduation pic. There are many others ways to practice it, mine is probably not the all-time but I am very comfortable with information technology.
During this final phase, I import everything I have rendered from 3ds Max.
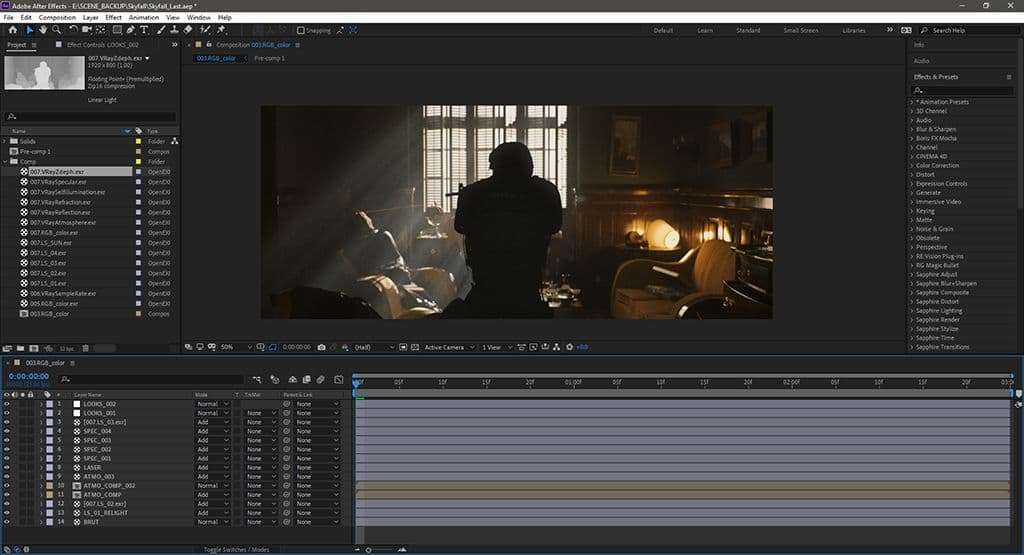
Then, I start my compositing with the RGB laissez passer, I volition add an "adjustment layer" and put a Magic Bullet Looks on it. Magic Bullet Looks is a great plugin, with a lot of "Filters" already done for you lot. It'south important to test everything, and especially to endeavour to create your ain filter too - it takes time but so over again in one case you understand a tool you go much faster!
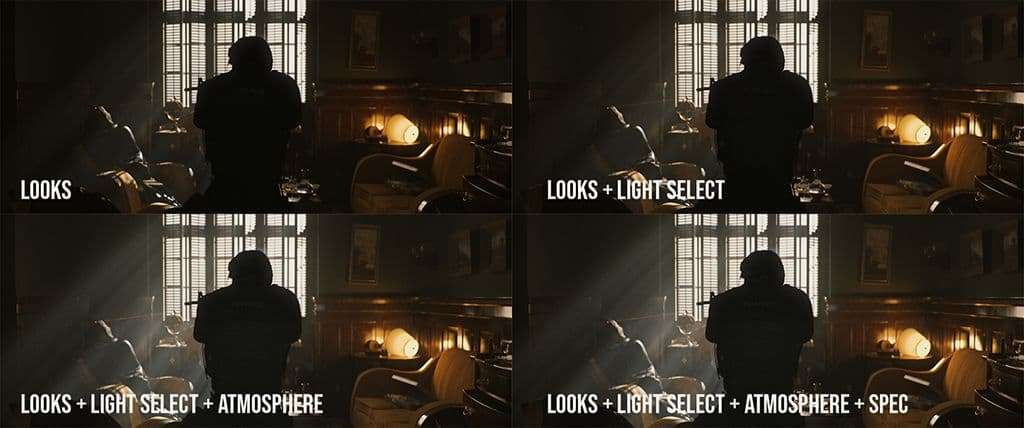
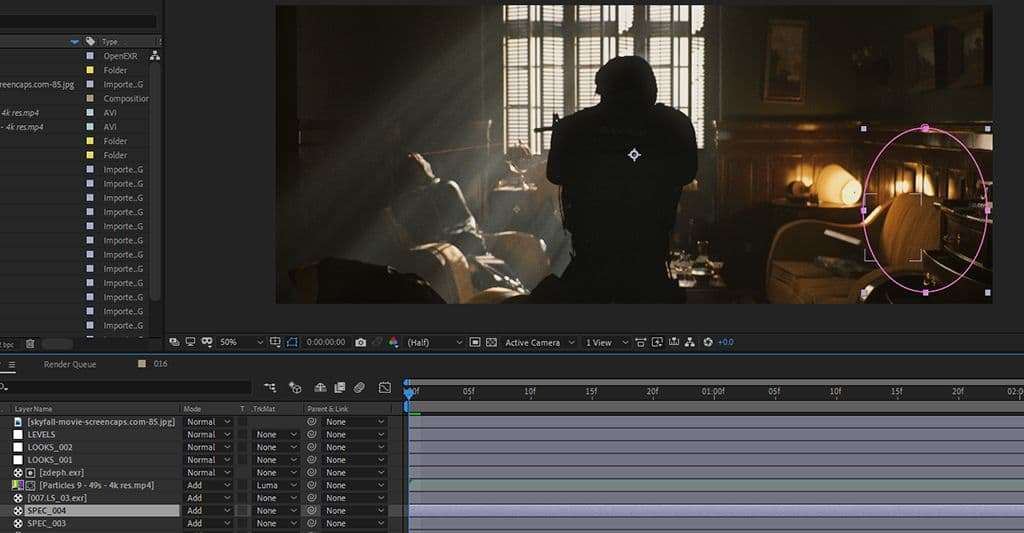
Then, the order of things tin vary, there is no perfect process. For example, for this project I first put the low-cal select in "Add" or ''Screen'' and and then I played with their opacity to slightly increase the intensities. Same with the VRayAtmosphere pass, it was difficult to have a nice 3D godray, then I didn't hesitate to boost it with the VRayAtmosphere pass, in "Add" or "Screen". I used the VRaySpecular pass, over again I put it in "Add together" or "Screen" and I make masks where I desire to increase the specs. Information technology's possible to do the same for each pass.
Depending on the project, sometimes I don't change much of the image I already have in 3D and sometimes, on the contrary, I can change a lot of things.
I hope this was helpful for some new 3D artists, it was a pleasure to share my process!
Source: https://discover.therookies.co/2020/07/31/how-to-make-a-realistic-cg-environment-using-3ds-max-and-v-ray/
0 Response to "How to Use an Image From the Internet in Art Academy 3ds"
Post a Comment